Monitoring Techniques and Data Analysis Applied to the Detection of Arc Welding Defects
By R Shaw
Industrial Need
Arc welding is currently monitored in-process primarily by relatively simple parametric monitoring or by visual inspection by a welding operator. These methods have certain weaknesses, and it would be preferable to find a more capable in-process monitoring method. This report reviews several possible options and their respective capabilities. These are more comprehensive parametric analysis, acoustic emission analysis and automated visual assessment.
Key findings
- Several welding trials, selected to produce either optimal or non-optimal weld qualities, were completed successfully. Non-optimal welds were then further divided into specific defect types. Each monitoring process was applied to the different defect types, and showed differing degrees of success at distinguishing between those defects and optimal conditions.
- Vision monitoring shows promise as a technique, with an accuracy of 70% or greater when categorising welding conditions into either optimal or specific defect states.
- Parametric monitoring has potential as a rapid-response alarm system for shut-off of non-optimal welding, but lacks sufficient granularity to distinguish between different non-optimal conditions.
- Acoustic monitoring detected some signals correlated with cracking, but is unlikely to be suitable as an in-process monitoring technique.
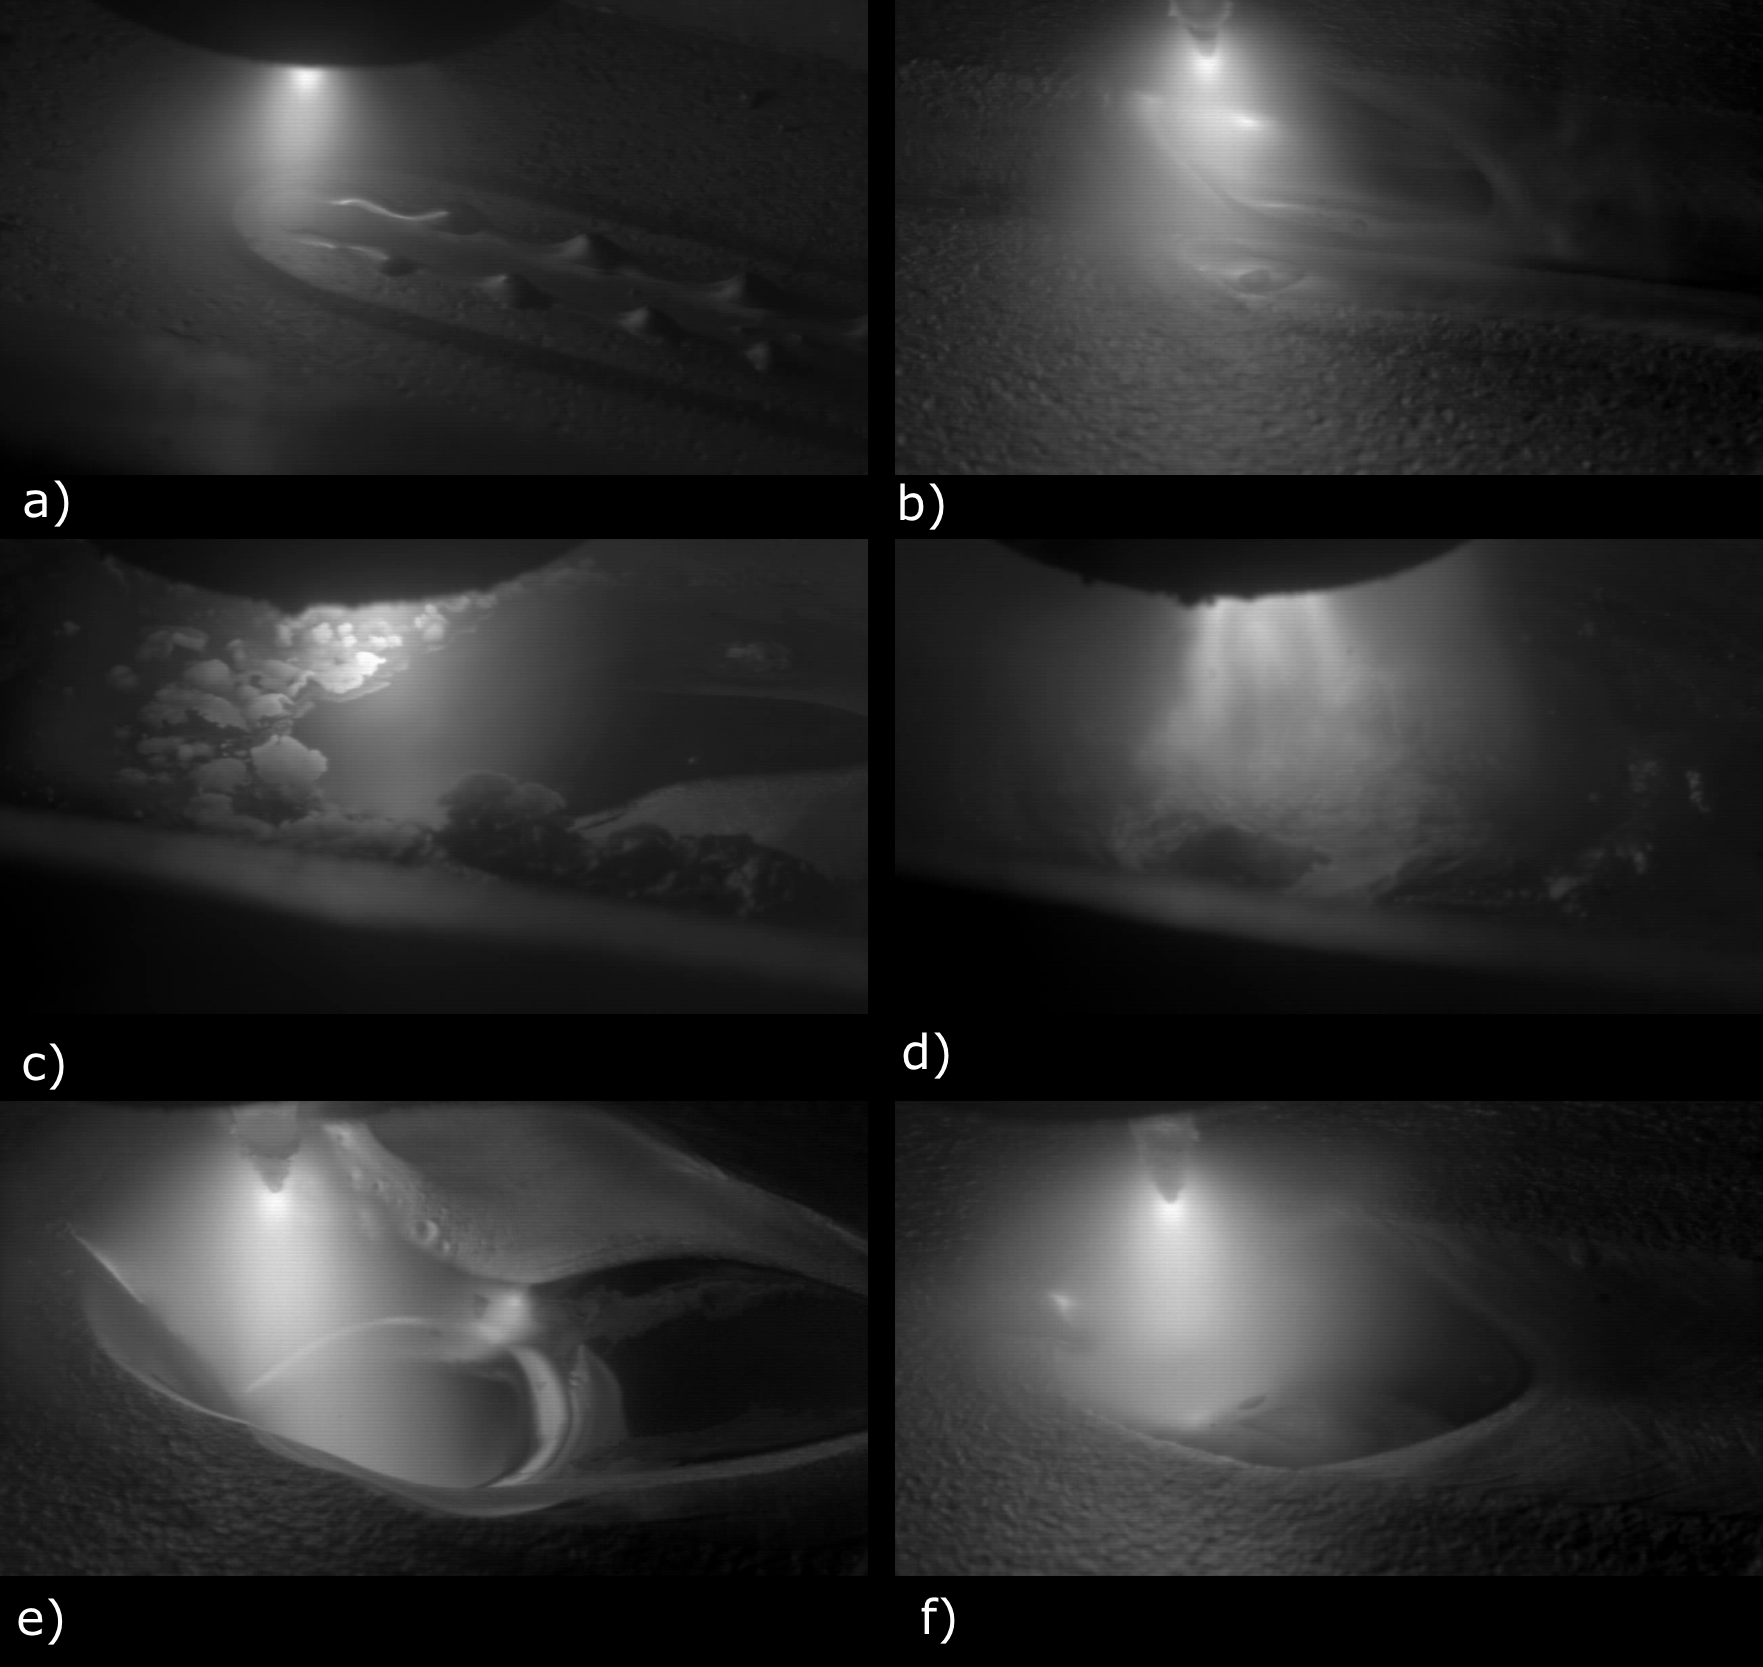
Typical images of stainless steel TIG welding under different conditions:
a) Excessive travel speed;
b) Lack of fusion;
c) Contamination;
d) Lack of shielding gas;
e) Burn-through;
f) Optimal conditions.
